


close
Choose Your Site
Global
Social Media
Views: 0 Author: Site Editor Publish Time: 2025-08-24 Origin: Site

Imagine stepping outside or heading to your basement and practicing on your own home putting green. With a home putting green, you can work on your stroke whenever you want, without the hassle of driving to the golf course or paying extra fees. Having a home putting green gives you easy access, saves you time, and helps you improve your game faster. You control the setup of your home putting green, so it perfectly fits your style and space. Want to play with friends or family? Just invite them over to enjoy your home putting green together!
A home putting green lets you practice anytime. You can get better at putting and feel more confident. You do not need to travel or pay extra money.
You can pick indoor or outdoor greens. You can choose synthetic or natural turf. You can also pick a size that fits your space and budget.
To set up a backyard green, you need a good spot. You must prepare the base well. You also need to install the turf carefully for the best results.
DIY kits help you build your green more easily. They also cost less money. You can change slopes, holes, and features to fit what you want.
You should brush the turf and clear away debris often. This keeps your putting green smooth. It will be ready for play all year.
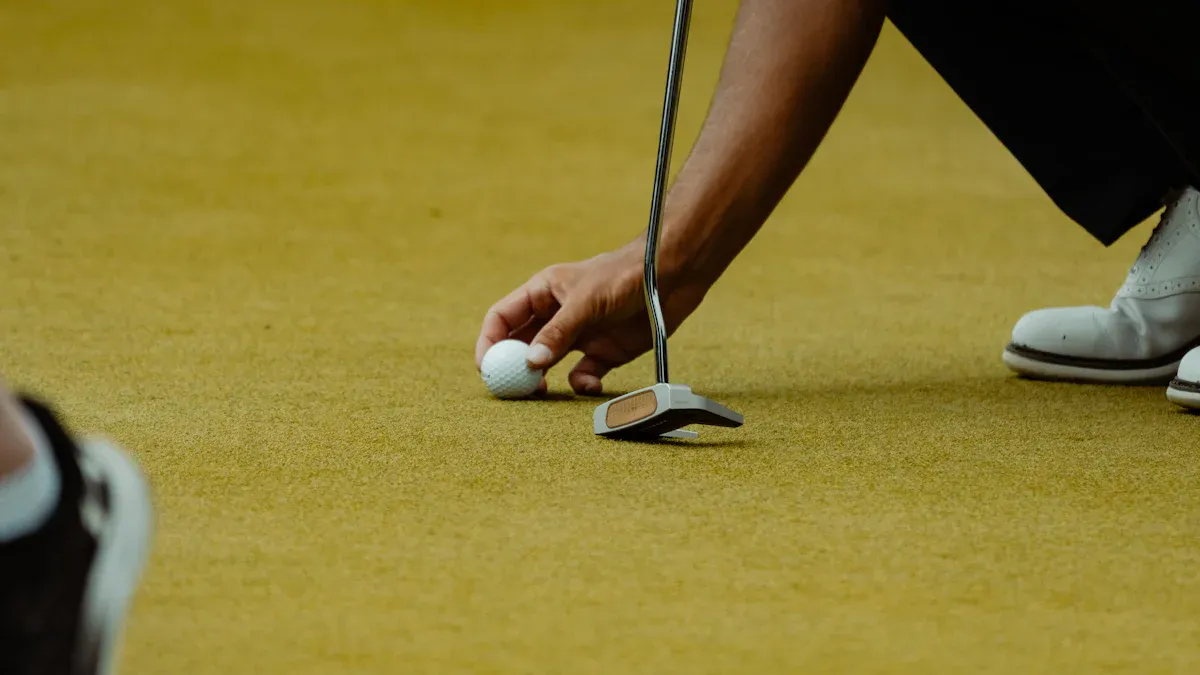
You want to get better at putting. You also want to feel more confident. Practicing on your own home putting green helps you do this. You can try drills like the Clock Drill or the One-Putt Challenge. These drills help you aim better and make your stroke more steady. You can also do target practice or work on distance control. This helps you learn how hard to hit the ball. If you practice often, your muscles remember what to do. You start to make the same stroke every time. You can set goals for yourself and celebrate when you reach them. This helps your mind stay strong. Most golfers hit about 60% of their shots within 100 yards of the green. So, practicing putting at home can really help your game.
Tip: When you practice in your backyard, you can use what you learned in lessons. You can also use these skills when you play on real golf courses.
You do not have to drive to the golf course. You do not need to wait for a tee time. With a home putting green, you can practice any time. You can even practice during short breaks. Here is how practicing at home compares to practicing at the golf course:
| Factor | Home Putting Practice (Backyard Putting Green) | Golf Course Practice |
|---|---|---|
| Convenience | You can practice right away. No travel or planning needed. | You must travel, book a tee time, and sometimes wait. |
| Customization | You can change slopes, speeds, and hole spots. | You must use the course as it is. |
| Weather Dependence | You can use synthetic turf all year. Rain or snow does not matter. | You cannot play if the weather is bad or greens are closed. |
| Practice Frequency | You can practice more often and for shorter times. | You practice less because of travel and planning. |
| Distraction & Focus | You can control your space and avoid distractions. | There may be noise or pressure from other players. |
You get to choose how your practice area looks. You can focus on your drills without anyone bothering you. Your backyard putting green can feel like a real golf course. The ball rolls true and the green speed stays the same.
Putting in a home putting green costs money once. You do not have to pay every time you practice. You also save money because you do not have to travel. Here is a look at the usual costs:
| Putting Green Type | Average Cost Range | Notes |
|---|---|---|
| Residential Backyard Putting Green | $1,500 – $15,000+ | Price depends on size, turf, how it is installed, and extra features. |
| Portable Putting Greens (Roll-Up) | $50 – $500 | Cheaper, easy to move, and good for indoors. |
A home putting green can make your house worth more. It is also a fun place for family and friends. Many people say their backyard putting greens last a long time. They do not need much care. You can use them all year.
You have two main choices for your home putting green: inside or outside. Each option has its own perks. If you want to practice all year, custom indoor putting greens work great. You do not have to worry about rain or snow. These greens are portable, easy to store, and usually cost less. You can set them up in a basement, garage, or even a spare room. The only limit is your space.
If you want a more real golf feel, try an outdoor green in your backyard. Outdoor greens let you add slopes, bumps, and even sand traps. You can make your green as big as your yard allows. Outdoor greens use weather-resistant materials, so they last through sun and rain. They do need more care and cost more to install, but you get a true golf experience.
Here’s a quick look at the differences:
| Factor | Indoor Putting Green | Outdoor Putting Green |
|---|---|---|
| Material | Nylon, high traction | Polypropylene or polyethylene |
| Maintenance | Low, no weather worries | More upkeep, weather exposure |
| Portability | Easy to move | Usually fixed |
| Practice Experience | Consistent surface | Realistic, can add slopes |
| Cost | More affordable | Higher cost |
| Size | Limited by room size | Can be much larger |
You also need to pick between synthetic turf and natural grass. Synthetic turf is popular for both indoor and backyard greens. It needs almost no care. You do not have to mow, water, or use chemicals. Synthetic turf stays green and smooth all year. It is also tough against pets and weather.
Natural grass looks and feels like a real golf course. But it takes a lot of work. You must mow it several times a week, water it, and fight weeds and bugs. After rain, natural grass can get muddy and hard to use. Synthetic turf, like an artificial putting green, drains well and is always ready for play.
Think about how much room you have. For a backyard green, most experts say you need at least 200 to 400 square feet. This size lets you add more holes and practice from different spots. If you have less space, you can still enjoy putting. Many indoor greens are 8 to 15 feet long and 2 to 3 feet wide. These smaller greens fit in tight spaces and help you work on your short game. Pick a size that fits your home and your goals.
Tip: Measure your space before you buy or build. This helps you get the best practice area for your needs.
You want your backyard putting green in a spot that gets enough sun and drains well. Pick a flat area with no more than a 3% slope. This helps your green stay smooth and easy to use. Avoid low spots where water collects after rain. If you have trees nearby, make sure they do not drop too many leaves on your green. A spot close to your patio or deck makes it easy to relax between putts.
Tip: A minimum size of 200 to 400 square feet works well for most backyard putting greens. This gives you space for several holes and lets more than one person play at once.
When you plan your putting green design, think about both looks and how you want to play. Here are some key features to consider:
Choose a shape that fits your yard, like kidney, oval, or free-form.
Add 2–3 holes spaced apart for different putting angles.
Use fringe turf around the edge for chipping practice.
Place a small tee box nearby for chip shots.
Add landscape lights if you want to play in the evening.
Include a bench or patio area for breaks.
Make sure you have good drainage so your green stays dry.
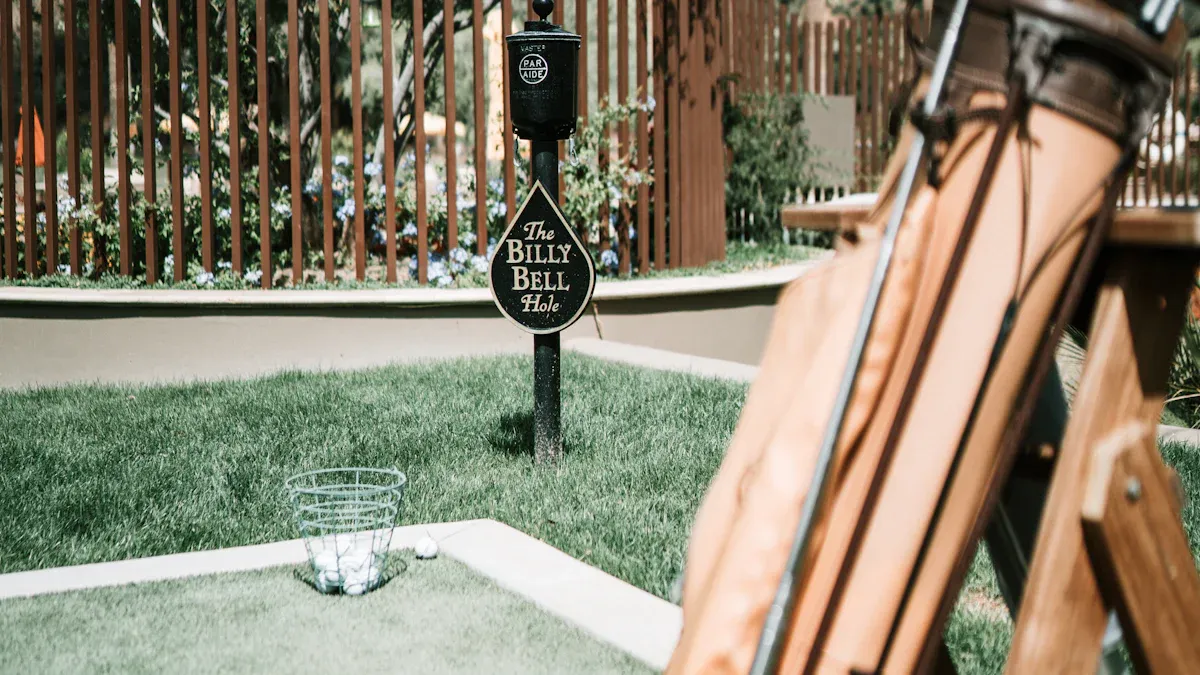
You can also add sand bunkers or a chipping pad if you want more challenge. Personal touches like flags or custom markers make your green feel special.
You have two main ways to install backyard putting greens: hire a pro or use a putting green kit. Many people choose modular kits because they are easy to set up and cost less. These kits come with everything you need, including turf, base panels, and cups. You just follow the steps and snap the pieces together.
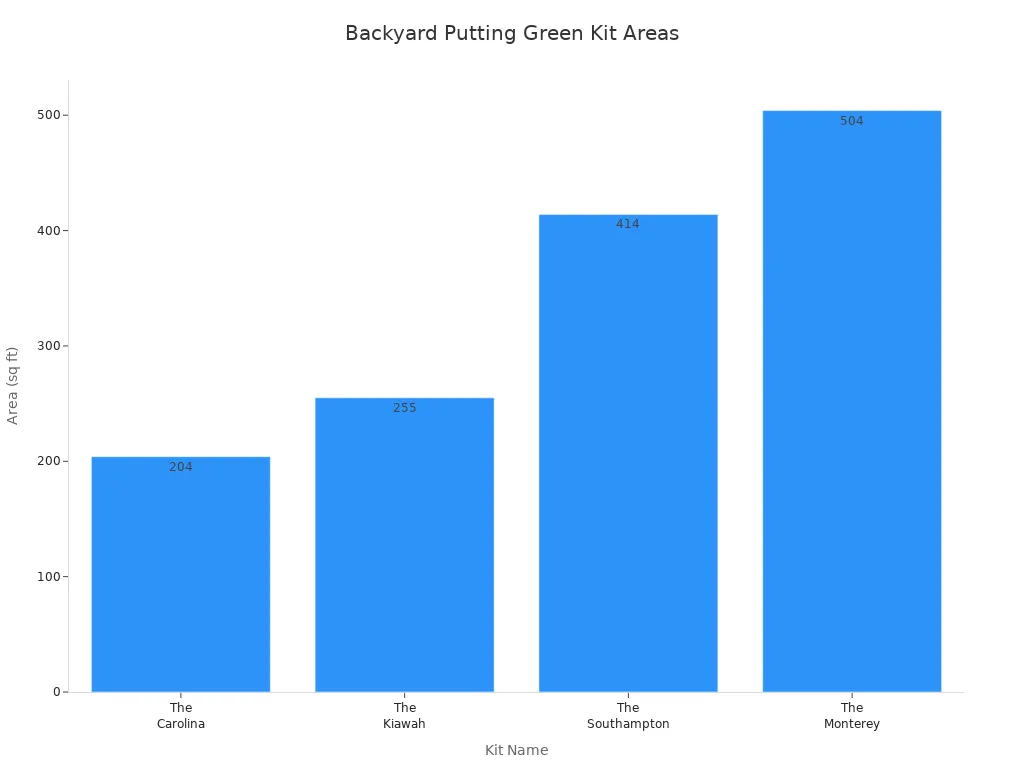
Here’s a look at some popular kits:
| Kit Name | Size (ft) | Area (sq ft) | Hole Locations |
|---|---|---|---|
| The Carolina | 12 x 17 | 204 | 2 |
| The Kiawah | 15 x 17 | 255 | 3 |
| The Southampton | 18 x 23 | 414 | 4 |
| The Monterey | 18 x 28 | 504 | 4 |
Backyard putting green cost depends on size and turf type. Here’s a quick guide:
| Green Size | Cost Range (per sq ft) |
|---|---|
| Small (<400) | $25 – $40 |
| Medium (400–2000) | $20 – $30 |
| Large (>2000) | $15 – $25 |
DIY kits can lower your costs to $4–$20 per square foot. Most of the cost comes from labor, so doing it yourself saves money. If you want expert help, many companies offer guidance or full installation.
Before you start building your diy backyard putting green, you need the right tools and materials. Having everything ready makes the process smoother and helps you avoid mistakes. Here’s a handy table to help you gather what you need for different installation types:
| Installation Type | Base Material & Depth | Tools & Materials Needed | Fastening & Infill Details |
|---|---|---|---|
| Basic | 4" crushed rock + 1/4" decomposed granite | Weed barrier, seam tape, 5" nails, 3" nails, 1" staples | 5" nails for seams, 3" nails for perimeter, 1" staples for interior, 0.5-1.5 lbs sand/sq ft |
| Basic with Fringe | 4" crushed rock + 1/4" decomposed granite | Weed barrier, seam tape, 5" nails, 1" staples | 5" nails for seams/fringe, 1" staples for interior, 0.5-1.5 lbs sand/sq ft |
| Premium | 2" crushed rock + bend-a-board + 1/4" decomposed granite | Weed barrier, bend-a-board, 12" composite stakes, seam tape, 1" staples | 1" staples for seams/perimeter/interior, 0.5-1.5 lbs sand/sq ft |
You’ll also want a measuring tape, turf cutter, plate compactor, utility knife, hammer, infill spreader, cup cutter, power broom, and a level. Renting a plate compactor can save you money. For the turf, sand-filled polypropylene is a cost-effective choice, but nylon turf lasts longer if you want a premium feel.
Tip: Always use a weed barrier under your putting green system to keep weeds from popping up later.
Building a diy backyard putting green takes time and effort, but you can do it if you follow each step carefully. Most people spend several days or even weeks on this project, so don’t rush. Here’s a simple guide to help you get started:
Clear and Prepare the Area
Remove grass, weeds, rocks, and debris. Level the ground and smooth out bumps. Pick a spot with good drainage and sunlight.
Frame the Shape
Use wooden boards or synthetic borders to outline your green. This helps keep the base and turf in place.
Excavate and Build the Base
Dig down 3–5 inches. Lay down a weed barrier fabric. Fill the area with 4 inches of crushed rock or gravel, then add 1/4 inch decomposed granite. Compact each layer tightly with a plate compactor.
Add Contours and Drainage
Shape the base to create gentle slopes and breaks, just like a real golf course. If your yard gets a lot of rain, add a drainage pipe under the base.
Lay Out and Secure the Turf
Roll out your artificial turf. Trim the edges to fit your frame. Align the turf fibers in the same direction for a smooth ball roll. Use seam tape and nails or staples to secure the turf every few inches along the edges and seams.
Install Cups and Flags
Cut holes for the cups using a cup cutter. Make sure the cups sit flush with the turf. Place flags in the cups for a real golf feel.
Apply Infill and Brush the Turf
Spread 0.5–1.5 pounds of silica sand per square foot over the turf. Use a power broom or stiff brush to work the sand into the fibers. This keeps the turf upright and helps the ball roll true.
Final Touches and Test
Trim any extra turf. Check the surface for bumps or wrinkles. Roll a few putts to test speed and bounce. Adjust the sand infill if needed.
Note: Take your time with each step. Rushing can lead to uneven surfaces or loose turf. Measure carefully, especially if your diy backyard green has curves or slopes.
You can make your diy backyard putting green unique and fun for everyone. Here are some ideas to help you customize your green for different skill levels and practice needs:
Add Elevation Changes
Build gentle slopes and undulations to practice reading greens and adjusting your putt.
Multiple Hole Locations
Cut extra holes in different spots. This lets you practice from many angles and distances.
Fringe and Chipping Areas
Install fringe turf around the edge for chipping practice. You can even add a small tee box for short chip shots.
Sand Traps and Water Hazards
If you want a challenge, add a sand bunker or a small water feature. These help you practice tricky shots.
Lighting for Night Play
Install landscape lights so you can play after sunset.
Different Turf Lengths
Use longer turf in some areas to simulate rough or collar shots.
Personal Touches
Choose a shape that matches your yard or your favorite golf hole. Add custom flags, markers, or even a bench for relaxing.
Tip: To keep weeds away, always use a high-quality weed barrier under your turf. Remove any weeds that appear on the surface right away. Brush the turf often to keep it looking and playing like new.
Callout: Most mistakes happen when you skip steps or rush. Always compact your base, align seams carefully, and secure the turf tightly. If you’re not sure, ask an expert or watch a few how-to videos before you start.
A diy backyard putting green gives you a fun, personal space to practice and play. With the right tools, a little patience, and some creativity, you can build a putting green system that lasts for years.
You want your backyard putting greens to look great and play smooth all year. Synthetic turf makes this easy, but you still need to care for it. Here’s what you should do:
Brush the turf every few weeks with a stiff broom. Brush against the grain to keep the blades upright and the putting surface even.
Clean up spills right away. Use mild soap and water, then rinse well.
Remove pet waste as soon as you see it. Rinse the spot and use a vinegar-water mix if you notice any odor.
Change your routine with the seasons:
In spring, check for low spots or damage, brush the turf, and rinse off dust.
In summer, brush often and rinse to cool the surface.
In fall, pick up leaves often to stop mold and moisture buildup.
In winter, use plastic tools to remove snow. Let ice melt on its own.
Avoid metal tools and harsh chemicals. These can damage the turf fibers.
Tip: Brush in different directions to keep the turf from matting, especially in spots where you walk a lot.
If you have a natural grass putting surface, you need to work a bit harder. You must mow the grass almost every day to keep it short—about 0.1 inches. Use a special mower made for putting greens. Water the grass often, but don’t flood it. Fertilize and aerate the soil to help roots grow strong. Watch for signs of stress, like yellow spots or wilting, and adjust your mowing and watering.
In spring, aerate the soil and use fertilizer with weed control.
In summer, water lightly during hot days to keep the grass cool.
In fall, clear leaves before and after mowing. Blow out irrigation lines before freezing weather.
In winter, remove ice and trim tree limbs to protect the green.
You also need to fight pests and diseases. Use safe treatments for bugs and fungus. Test your soil to know what nutrients it needs.
Note: Natural grass needs more care and costs more to keep healthy. Many golfers switch to synthetic turf for easier upkeep.
Sometimes problems pop up with your putting green. Here’s a quick table to help you spot issues and fix them fast:
| Problem | Cause | Solution |
|---|---|---|
| Uneven surface | Poor base prep | Compact soil, add crushed stone, re-level |
| Drainage issues | Wrong slope or base material | Add slope, use porous base, clear drains |
| Weed growth | Weeds at edges or seams | Use weed barrier, pull weeds by hand |
| Moss buildup | Debris in shady, damp spots | Remove debris, brush turf, use leaf blower |
| Visible seams | Bad turf joining | Use quality seaming tape, align turf blades |
| Odors and stains | Pet waste or spills | Clean quickly, rinse, use turf deodorizer |
| Loose edges | Poor securing | Staple or nail edges every 1–2 feet |
If you see bumps or water pooling, check the base and drainage. Brush the turf and add infill to keep the surface smooth. For tough problems, you might need to re-level the base or call a pro.
Callout: Regular care keeps your backyard putting greens looking sharp and ready for play. A little effort goes a long way!
You can build a home putting green that fits your space and skill level. With regular practice, you will see big benefits:
You build muscle memory and make your stroke automatic.
You feel less nervous when you play real games.
You get to practice anytime, even during short breaks.
You create fun challenges and enjoy time with family.
Start planning today and enjoy putting practice all year!
Most DIY backyard putting greens take about 2–5 days to install. If you use a modular kit, you can finish faster. Hiring a pro can speed things up even more. Plan for extra time if you want custom features.
Yes, you can use synthetic putting greens all year. Snow and ice may cover the surface, but you just need to clear them off. Natural grass greens do not work well in cold months. Synthetic turf gives you more play time.
Brush your green every week. Pick up leaves, twigs, and debris right away. For spills, use mild soap and water. If you have pets, rinse the area after they use it. Regular care keeps your green looking great.
Absolutely! Home putting greens work for all ages and skill levels. Kids can learn the basics. Beginners can practice without pressure. You can set up fun games or challenges for the whole family. Everyone can enjoy the green together.


